
Pond design and construction | How do you design a pond
Is it best to draw up a plan first?
It is always a good idea to make a plan of what you want to do before you start. You do not have to be an artist: even the roughest sketch and plan will help you visualize what you are trying to do and how you will do it. The building process will be much easier if you can get the pond right the first time round. If the hole is too big it is difficult to replace the earth and compact it sufficiently so that it does not subside, but it is even worse if the levels are wrong and you do not discover this until the pond is filled. Emptying a pond, removing the liner and reconstructing it is not only difficult but demoralizing. If you plan everything as carefully as possible, the whole process will go smoothly. Even write down a list of tools you are likely to require so that everything is at hand when you want it. Do not worry if you cannot draw: this is not a competition and no one else need see it.
How do I prepare a plan?
Start by making an accurate, measured plan of the garden and mark on it all the permanent features, such as trees, borders, lawns and buildings. If you know their position, also draw in the route of any mains services that run across your garden. Then draw the rough outline of the pond you would like. If you are unsure about the position of the pond, take several photocopies of the original garden plan so that you can keep sketching the outline until you find a shape, size and position you like. Alternatively, use tracing paper overlays so that you can assess a number of possible ponds. If possible, make your rough sketches on squared paper so that you can use the grid as a guide when you come to draw out the pond in greater detail to a bigger scale. This step might not be necessary if you are planning a regularly shaped pond, but if the pond is going to have an irregular shape the grid will be useful when you transfer the design to the ground. The plan should include not only the outline of the pond but also an indication of the depths of the pond and where you want planting ledges.How do I transfer the design on the plan to the ground?
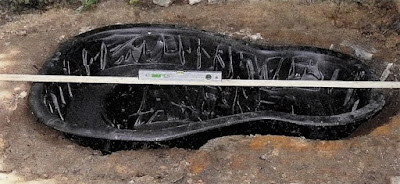
If you do not mind if the finished pond is not exactly as it is shown on the plan, you can mark one or two points on the garden so that its general position is correct and then lay a garden hose on a ground to indicate the desired line. If it is a complicated shape, however, and you want to make sure that it is accurately transferred from your plan, it will be worth replicating the grid on the ground with pegs and strings so that you can carefully place the pipe at the equivalent points on the string where it crosses the grid lines on the plan. Once the pipe is in position, dig around it with a spade or trickle sand from a bottle right round the pipe to mark its position. Remove the pegs, string and pipe and you are ready to start.Marking the pond on the ground
Rather than drawing a plan, you could simply mark the proposed position of the pond on the ground by laying string or a garden hose on the ground. This has the advantage that you can move the outline until you are happy with it. You can also view the proposed pond from different parts of the garden and house, including upstairs windows. Spray paint or sand can also be used, and if you are planning a small pond an old mirror will give you a good indication of how the finished feature will look.
My garden is sloping. How do I mark it out?
The pond is laid out in the same way as one on a level plot: work out the outline and then the levels. When you come to construct the pond it will need either cutting into the slope at one end or building up at the other, or, which is more usual, a combination of both. If the pond is going to be a regular shape you will have to take into account the fact that if you mark out the precise shape on the sloping ground, once it is raised to the horizontal the shape will be distorted, and you must allow for this by combining both operations and using the levelling pegs to provide the outline also.When you do this the shape of the pond is indicated by the tops of the pegs rather than their base. If this sounds confusing, hold a circular lid at an angle and look down on it. Although you know that the lid is circular, because it is at an angle it appears to be oval. The same is happening on the ground. If you mark a precise circle on sloping ground you are, in effect, marking out a shape that will be an oval when the banks are built up to make the sides horizontal.


Comments
Post a Comment