
How to install a plastic pond liner?
Laying a flexible liner
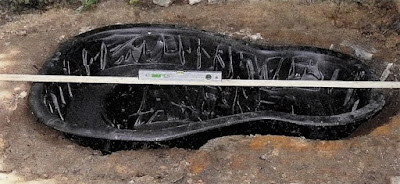
How do I get the liner into the pond?
Although this is the most exciting stage in building a pond, it is also the most worrying, because if things go wrong it is a lot of work to take it apart and to start again.First, lay the liner across the pool, stretching it out horizontally for as far as it will go. Drape it loosely over the hole and make sure that it is centred over the pond so that when it sinks into it there will be an equal amount of liner all round the edge. Place paving slabs, bricks or building blocks on the outer edges of the liner. It is a good idea to stand these on several thicknesses of newspaper so that any sharp corners do not puncture the liner. The liner will sag slightly over the hole. Place the end of a garden hose in this hollow and begin to fill the liner very slowly. As the hollow fills, the weight of water will drag the liner down into the hole. The stones and bricks should be heavy enough to keep the liner in position so that it is only gradually allowed to sink into the pond. As the liner falls into the pond under the weight of the water, it will mould itself to the shape of the pond. If you are using butyl the liner should sink in smoothly without any creases forming. Other liners are not so easy to use, and you must smooth out any creases that appear. If the liner has been correctly sized and positioned the edges should extend beyond the top edge of the pond by about 30cm (1ft) ali round.

Unfolding the liner
If you are building a small pond and have room in the garden, open out the liner and spread it out on the lawn. Leave it to warm up in the sun; this will make it easier to smooth out any creases and make the liner more pliable. If you have ordered a liner for a large pool, follow the manufacturer's instructions about unfolding it. Depending on how the supplier has folded it, the liner may need to be positioned either at one end of the pond or in the centre.What do l do with the edges of the liner?
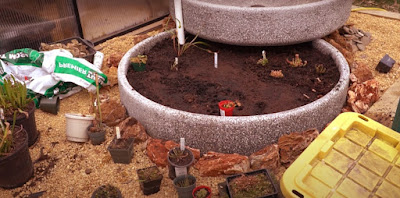
The edges of both the underlay and the liner should be buried, and there are a number of ways of doing this. The first is simply to lay the liner over the edge of the pond and along the surface of the soil and then cover this with paving slabs so that it does not show. Alternatively, you can dig a trench about 15cm (6in) away from the edge of the pond. Turn the liner into this and replace the soil. Place slabs over this or cover it with grass. If there is enough liner around the edge of the pond you can create a boggy margin in which moisture-loving plants will thrive. Dig a trench 60cm (2ft) or more wide to about 30cm (1ft) deep around the pond. Fold the liner into this trench and then up the sides to the surface. Place bricks or stones around the edge of the pond and fill the liner-lined trench behind the stones with soil.Repairs
Keep any off-cuts that are left over after trimming the liner. They may come in useful if you ever have to repair a puncture or tear in the pond.The edges of the liner can be seen above the water. How can I hide them?
This is a difficult problem to resolve once the pond has been filled with water because it is impossible to straighten out the wrinkles that often make the liner show up.One solution is to use paving slabs that overhang the edge of the pond and obscure the liner. These must be firmly cemented in place so that they do not tip up when people step on them. An alternative solution is to use plants around the edge of the pond. Choose species that will hang down into the water.


Comments
Post a Comment